
Steps To Create An eCommerce Website From Scratch
-
Mary Cuver
-
29 Jun 2021
eCommerce is the future of business. This blog lets beginners know about the steps to create an excellent eCommerce site.
E-commerce is booming. People are actually quitting their 9-5 boring jobs and moving towards starting online businesses. Why wouldn’t they? It’s way less hectic than full-time jobs, and there is a lot of profit as well.
However, you cannot just jump into the eCommerce business all of a sudden. Testing the waters, getting the hang of the process, and learning the necessary skills to run an online business are essential aspects you should get a hold of before creating an eCommerce website.
So, how to build an eCommerce website from scratch on WordPress? Creating an eCommerce website is an easy task if you have the know-how of WordPress; otherwise, the process may be tedious. This blog aims to state clearly how one can create an eCommerce website that is impressive in both aspects; looks and functions.
Let’s dive into the details of how you can create an eCommerce website seamlessly without hitting the least snags.
Steps To Make An Ecommerce Website That Booms
When creating a website, questions like “How much does it cost to build a website online for a small business?” and “How much does WooCommerce cost?” often come to your mind. These steps will clear all these confusions.
1. Set A Domain Name
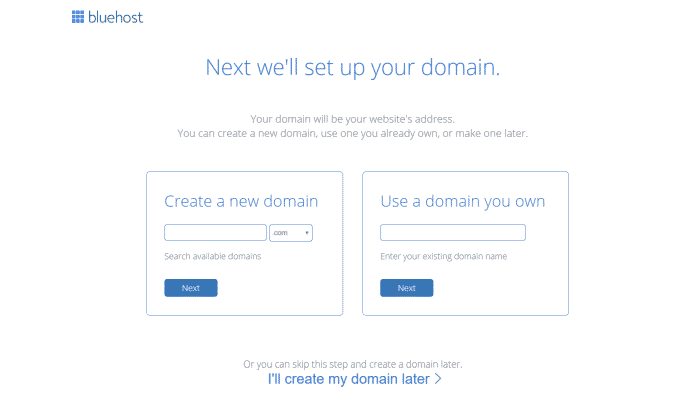
The domain name sets an image of your business. Therefore, it is something that you should give a lot of thought to. Once you have set a domain name, changing it can cause many problems—In simpler words, you will be heading towards rebranding. Therefore, it is vital to keep your domain name matching the domain name.
Domain names are a huge convenience for us since it would have been tough to remember those long IP addresses. You have the freedom to choose whatever domain name you think looks better for your business.
Purchasing a domain name isn’t a tedious task. Domain names are readily available on NameCheap and Bluehost. There are many cases where the desirable name is available but at surprisingly higher rates. But you won’t have to pay that hefty amount on every renewal. Even the priciest of the domain names are renewed at $10-$20 per year.
Furthermore, the type of extension you use in your domain decides who gets to access your website. For instance, if your domain extension is .au, then your website will stay within the limits of Australia, and the Australians will be your primary target audience.
2. Purchase A Suitable Hosting Provider
You will need a place to store all the belongings of your website, such as pictures, coding, content, etc. This place is called a hosting provider. You won’t have to dig much to find the ultimate hosting providers. However, without hosting, you won’t display any of your content whenever a user types your domain name to access it.
Hosting providers have different plans according to the needs of their buyers since every person has a different website that serves a specific purpose. For example, there are hostings available for blogs, Portfolios, and most importantly, eCommerce websites.
A hosting provider that offers its services for different kinds of websites is BlueHost. Instead of wandering here and there, opting for BlueHost will solve many problems that would otherwise, the whole process of website handling will be a touch chaotic.
When you are in control of an eCommerce site, you are also in control of the credit card information of your customers. Therefore, shared hosting is a resounding NO as it will pose a threat to your buyers’ credit card information.
3. Installing WordPress
There is more than just one way to get your website integrated with WordPress. You can do it through the following ways:
- Select a hosting that coming with a one-click installation feature
- Installing WordPress Manually
The latter one is too time-consuming as compared with the first one. Selecting a hosting that also offers WordPress installation is like killing two birds with one stone.
· Installing WordPress Via Hosting

Installing WordPress through your hosting is the easiest way. You don’t have to go through any lengthy procedures. Once you sign up for your hosting, you will get your WordPress ready to use. There are no confusing steps to wander here and there to install WordPress.
This is the ideal way to install WordPress because when there’s an easy way, why take the challenging route?
There aren’t many plugins that offer a one-click installation feature, but one of them that does offer this feature is BlueHost. All you have to do is purchase a plan and create a site which is a very straightforward process. Once you have chosen a domain name, your hosting will install your WordPress in the next step.
4. Integrate “WooCommerce” Plugin

WooCommerce is the perfect partner of every Online business owner. The ratings, the reviews, and the number of active users of this plugin are extraordinary. There is a long list of things you can do with the free WooCommerce plugin. However, some features may require you to pay a certain amount.
The first aspect of this plugin that makes everyone compelled to opt for it is entirely free. Moreover, all thanks to the wide variety of free themes available, you don’t have to pay to customize your website unless you want a paid theme. However, if you have the budget for a paid theme, WordPress ThemeForest has the best premium plugins.
Here are some features that the Free version of WooCommerce offers: Product pages, Shopping carts, product tags, product rating, displaying unlimited images for your website, and so on. But, most importantly, they offer premium security to their users and your website.
WooCommerce is the most uncomplicated way to solve your website design problems. Nevertheless, there are always more options available in the market that might work just as well as WooCommerce.
· Installation

Installing this plugin is relatively straightforward. All you have to do is select the “Plugin” option on your WordPress dashboard. Then head to the search bar and type WooCommerce.

Click on install; once the installation is over, the install sign will turn into an activate sign that will activate the plugin upon clicking.
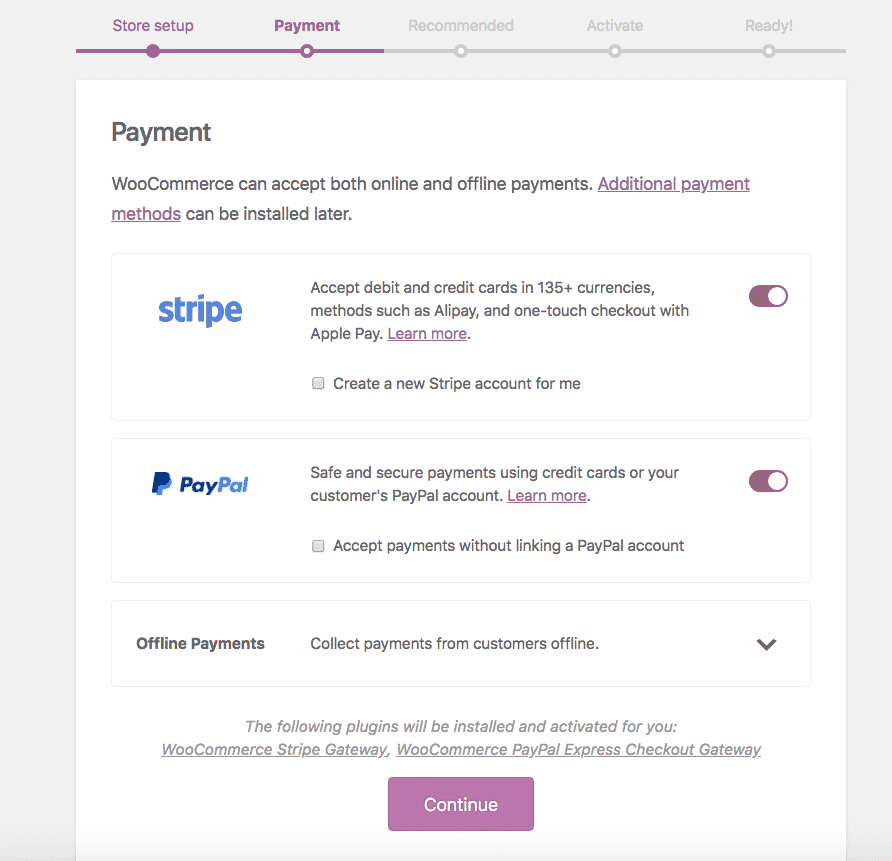
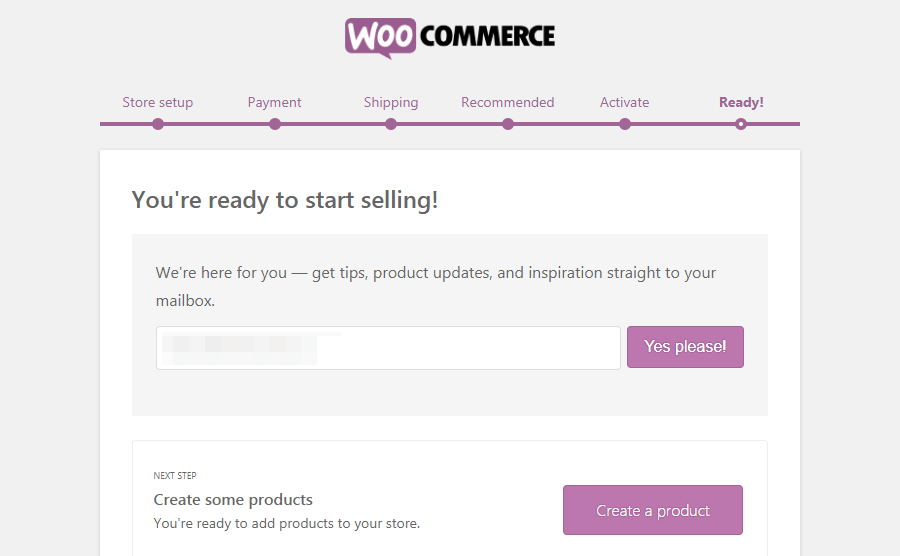
Next, you have to go through the payment setup, adding business information, Choosing shipping options, and more.
5. Add An Eye-Catching Theme

The default design of your WordPress can be tedious. So, fiddling with the HTML code may result in some exquisite designs. The versatility of WordPress customization can allow you to change the design according to your liking.
But this is only possible for the coding gurus, but the ones that avoid coding at all costs are stranded either. Several third-party plugins offer ready-made themes that match your website’s purpose. It is quick, easy, and exquisite. What more would someone want, right?
Getting a splendid theme is a one-time investment, so make sure you are going for the best one. Elegant Themes and ThemeForest have unlimited free and premium themes for their users, so you’d have a wide variety to select from or you could just use the ones available on WordPress.
6. Adding products
Another primary step is the addition of products to your website. The products you are selling on your WordPress site are the main reason for traffic on your website. Adding products to your websites comes with a lot of requirements.
This can be done when you are at the end of your WooCommerce setup. You will have a form-like page where they will require information about the product to be added. Of course, you can always skip this step if you are not ready to upload the products yet.
To add products later, you can go to your WordPress dashboard and click on the products option. Then, select the “Add new” option to add series of products to your website.
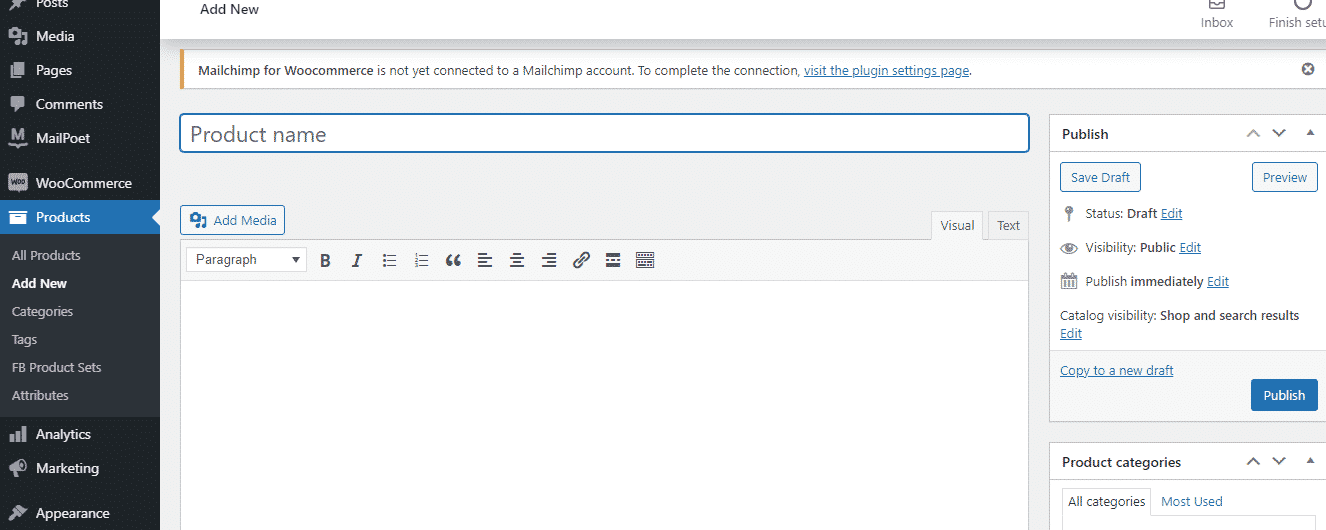
The information you will have to add for every product is the name of the item, the cost, an appropriate image, a short description that sums up what your product is offering, another description but longer to dive into the details, and then finally the category your product may belong to.
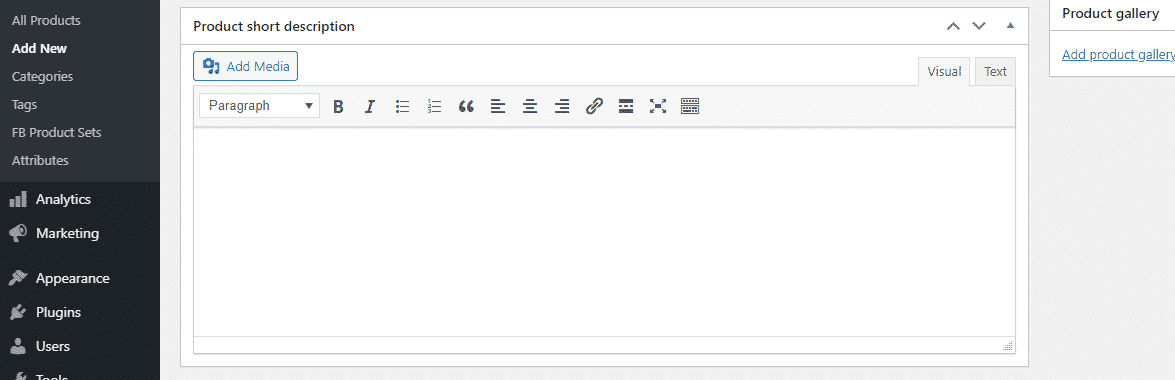
· Addition of products via WooCommerce
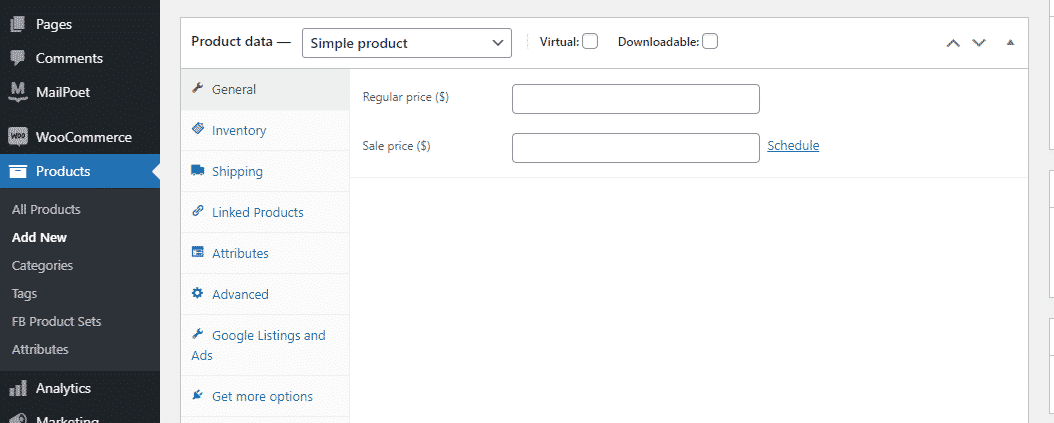
Your products can be divided into several types such as variable, downloadable, grouped, simple, affiliate, and virtual. All instructions on uploading each type of product are available in the WooCommerce documentation.
You will see a lot of tabs waiting to be filled when you are adding products via WooCommerce. The tabs are; Inventory, shipping, Attributes, Linked products, and general. After filling in all information, click the publish button to make the product go live.
7. Essential Plugins For Your eCommerce site
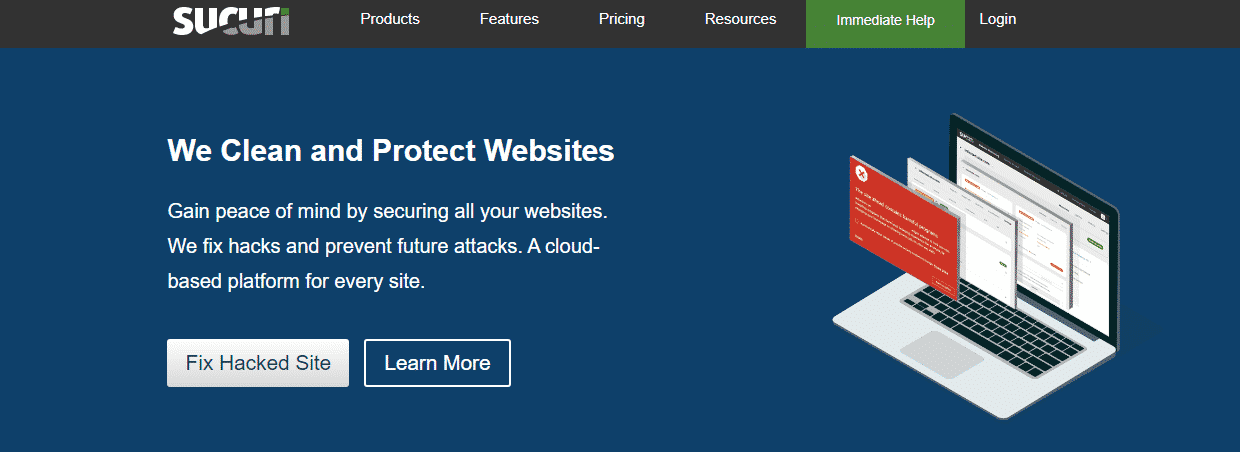
Sucuri– The Sucuri plugin helps keep your website safe from attackers. It offers a variety of features which include Malware Scan, File Change Detection, and WAF. Their basic version costs $199.99/year, the Pro version $299.99/year, and the business version $499.99/year.
YOAST– If you want your business to thrive, then the YOAST plugin is the best since it takes care of your website’s SEO. YOAST offers a lot of features without charging a penny, but the premium version has even more features and costs $89/year.

Site Review– Adding a reviews section helps in making your online business more trustworthy. It is a free plugin, but you can purchase add-ons for an even better experience.

Conclusion
By following the steps mentioned above, you can easily set up your eCommerce business website. You can run your eCommerce website smoothly even if you don’t know coding.
With a large ratio of people moving towards the eCommerce business, there will be a lot of competition. However, if you follow this guide religiously, beating your competitors won’t that big of a problem. After finishing the article, you will be qualified enough to launch your website expertly.
FAQs
Q.1 How much does it cost to build an eCommerce site from scratch?
Ans: The cost can hover around $10,000-500,000 depending upon the type of website you want.
Q.2 How long does it take to build an eCommerce site from scratch?
Ans: E-commerce sites are notorious for taking the longest to build. It generally takes around 5-12 months.
Q.3 Can you build your own eCommerce website?
Ans: Yes! However, it may take a lot of your time.
Q.4 Which website Builder is best for eCommerce?
Wix, Shopify, and BigCommerce are some of the best website builders to use for your website.
208 Replies to “Steps To Create An eCommerce Website From Scratch”
Leave a Reply
Recommended WordPress Hosting
Featured WordPress Plugin

Latest blog articles
- Best WordPress Theme for SEO Are you having trouble finding an appropriate theme for your website?
- How To Start A Fitness Blog; Steps And Recommendations Are you having trouble finding an appropriate theme for your website?
- Best Website Builder for Authors you should consider in 2021 Are you having trouble finding an appropriate theme for your website?
- Easy and Effective ways to create a Landing page in WordPress Are you having trouble finding an appropriate theme for your website?
- How to Add an Accordion in WordPress Are you having trouble finding an appropriate theme for your website?
- Top 5 PayPal Plugin For WordPress; Reviews, Pricing, And Comparison Are you having trouble finding an appropriate theme for your website?
What i do not realize is actually how you’re not actually much more well-liked than you may be right now. You are very intelligent. You realize therefore significantly relating to this subject, produced me personally consider it from a lot of varied angles. Its like women and men aren’t fascinated unless it’s one thing to accomplish with Lady gaga! Your own stuffs great. Always maintain it up!
[url=https://ivermectin.trade/]ivermectin oral[/url]
[url=http://onlinepharmacy.best/elimite.html]permethrin cream[/url]
[url=https://sildenafil.africa/]where to buy viagra without prescription[/url]
[url=https://celexa.science/]cheapest price for celexa[/url]
[url=http://clopidogrel.science/]buy plavix 75 mg online uk[/url]
[url=https://lisinopril.best/]can you buy lisinopril over the counter[/url]
[url=https://hydroxychloroquine.guru/]hydroxychloroquine antiviral[/url]
[url=https://sildenafil.cfd/]how to buy viagra online canada[/url]
[url=http://lisinopril.best/]lisinopril online pharmacy[/url]
[url=http://azithromycin.digital/]generic for azithromycin[/url]
[url=http://baclofen.cfd/]baclofen 10 mg lowest price[/url]
[url=https://toradol.cfd/]toradol 15[/url]
[url=http://finpecia.cyou/]propecia mexico[/url]
[url=https://vardenafil.cyou/]drug levitra[/url]
[url=https://atarax.cyou/]order atarax online[/url]
[url=https://finasteride.digital/]pharmacy propecia[/url]
[url=https://finasteride.best/]propecia online pharmacy uk[/url]
[url=https://prednisone.cyou/]prednisone over the counter south africa[/url]
[url=http://neurontin.cfd/]gabapentin from canada[/url]
[url=https://albuterol.cyou/]albuterol 90 mcg price[/url]
[url=http://onlinepharmacy.cyou/]canadian family pharmacy[/url]
[url=http://paxil.cfd/]paxil cost[/url]
[url=http://paxil.cfd/]generic paxil mexico[/url]
[url=http://vermox.cfd/]vermox uk buy online[/url]
[url=https://metformin.cfd/]metformin without prescription[/url]
[url=http://albuterol.cfd/]buy ventolin inhaler online[/url]
[url=https://fluoxetine.cyou/]prozac 80 mg daily[/url]
[url=https://colchicine.cyou/]colchicine 5mg[/url]
[url=http://hydroxychloroquine.guru/]plaquenil coupon[/url]
[url=http://neurontin.cfd/]buy gabapentin[/url]
[url=http://levitra.cfd/]no prescription vardenafil[/url]
[url=https://synthroid.directory/]synthroid 25 mcg daily[/url]
[url=https://augmentin.cyou/]buy amoxicillin canada[/url]
[url=http://zoloft.cfd/]best generic zoloft brand[/url]
[url=https://finpecia.cyou/]buy generic propecia 1mg online[/url]
[url=https://vardenafil.directory/]levitra 10mg canada[/url]
[url=https://albuterol.cyou/]ventolin hfa 108[/url]
[url=https://doxycycline.cyou/]doxycycline 20 mg capsules[/url]
[url=http://synthroid.directory/]synthroid 175 mcg tablet[/url]
[url=https://xenical.cfd/]xenical[/url]
[url=https://doxycycline.directory/]doxycycline pharmacy price[/url]
[url=http://synthroid.directory/]synthroid 150 mcg tablet[/url]
[url=http://zithromax.cyou/]azithromycin 250 mg tablet cost[/url]
[url=http://zithromax.cyou/]where to buy zithromax over the counter[/url]
[url=http://vermox.cyou/]where to buy vermox online[/url]
[url=http://clonidine.cyou/]buy clonidine[/url]
[url=http://accutane.guru/]accutane cream online[/url]
[url=https://augmentin.cfd/]augmentin brand name india[/url]
[url=https://doxycycline.cfd/]buy doxycycline australia[/url]
[url=http://accutane.guru/]accutane india online[/url]
[url=http://levitra.cfd/]levitra in canada[/url]
[url=http://clonidine.cfd/]clonidine 0.1mg without prescription[/url]
[url=https://paxil.cfd/]paroxetine 10 mg price india[/url]
[url=http://augmentin.best/]can i purchase amoxicillin online[/url]
[url=https://tadalafil.cyou/]cialis for daily use best price[/url]
[url=https://atarax.cyou/]atarax price usa[/url]
[url=https://doxycycline.cyou/]doxycycline cost canada[/url]
[url=https://ivermectin.guru/]where to buy ivermectin cream[/url]
[url=http://toradol.cfd/]toradol medicine[/url]
[url=https://furosemide.cyou/]furosemide medicine[/url]
[url=https://silagra.cyou/]silagra pills[/url]
[url=http://bactrim.cyou/]bactrim ds antibiotic[/url]
[url=http://synthroid.boutique/]synthroid 50 mcg price in india[/url]
[url=https://doxycycline.cyou/]doxycycline 150 mg cost[/url]
[url=https://retina.directory/]buy tretinoin[/url]
[url=http://doxycycline.cfd/]buy 40 mg doxycycline[/url]
[url=http://lexapro.cfd/]lexapro otc[/url]
[url=http://synthroid.boutique/]cost of synthroid 50 mcg[/url]
[url=http://diflucan.cyou/]150 mg diflucan online[/url]
[url=http://retina.directory/]retin a 0.01 cream price[/url]
[url=http://propecia.cyou/]cheap propecia for sale[/url]
[url=https://lyrica.cfd/]purchase lyrica[/url]
[url=https://amoxicillin.cyou/]amoxicillin 500 mg capsule[/url]
[url=http://fluoxetine.cyou/]can you buy prozac over the counter in canada[/url]
[url=https://sildenafil.cyou/]sildenafil 100mg buy online us without a prescription[/url]
[url=http://effexor.cyou/]effexor xl[/url]
[url=https://finasteride.best/]finasteride for women[/url]
[url=http://ivermectin.guru/]ivermectin 1[/url]
[url=https://vardenafil.directory/]levitra 10[/url]
[url=http://lisinopril.best/]lisinopril 40 mg pill[/url]
[url=https://finasteride.cyou/]propecia prices australia[/url]
[url=https://lisinopril.best/]lisinopril 5 mg tablet cost[/url]
[url=https://lexapro.cfd/]lexapro drug[/url]
[url=https://augmentin.cfd/]buy augmentin over the counter[/url]
[url=http://ivermectin.guru/]where to buy ivermectin pills[/url]
[url=http://effexor.cyou/]compare effexor prices[/url]
[url=http://ivermectin.guru/]stromectol order online[/url]
[url=https://amoxicillin.cyou/]augmentin over the counter usa[/url]
[url=https://azithromycin.digital/]azithromycin buy online[/url]
[url=https://tadalafil.cfd/]buy discount cialis[/url]
[url=https://diflucan.cfd/]diflucan cream otc[/url]
[url=https://doxycycline.cyou/]doxycycline prescription price[/url]
[url=https://clomid.digital/]clomid uk cost[/url]
[url=http://albuterol.cyou/]ventolin over the counter[/url]
[url=http://clonidine.cfd/]clonidine for insomnia[/url]
[url=http://prednisolone.directory/]cheap prednisolone uk[/url]
[url=http://ivermectin.guru/]ivermectin over the counter uk[/url]
[url=http://albuterol.cfd/]ventolin 2018[/url]
[url=http://albuterol.guru/]ventolin tablet[/url]
[url=https://augmentin.cfd/]amoxicillin capsule 500mg tablets[/url]
[url=http://finasteride.digital/]cost of propecia generic[/url]
[url=https://trazodone.best/]trazodone brand name australia[/url]
[url=http://sildenafil.cyou/]female viagra cream[/url]
[url=https://baclofen.cfd/]baclofen cream over the counter[/url]
[url=https://augmentin.guru/]medicine augmentin 625[/url]
[url=http://synthroid.directory/]synthroid 0.137 mg[/url]
[url=http://zoloft.cfd/]zoloft 25mg[/url]
[url=http://amoxicillin.cyou/]augmentin 875 mg generic[/url]
[url=http://avana.cfd/]dapoxetine 60 mg price in india[/url]
[url=http://augmentin.best/]augmentin uk online[/url]
[url=https://robaxin.cyou/]robaxin without prescription[/url]
[url=http://wellbutrin.cfd/]bupropion sr 100mg[/url]
[url=https://doxycycline.cfd/]doxycycline 20 mg price[/url]
[url=https://trazodone.cfd/]trazodone no prescription[/url]
[url=http://prozac.cfd/]prozac pills for sale[/url]
[url=http://doxycycline.cfd/]doxycycline 20 mg cost[/url]
[url=http://metformin.cfd/]can i buy metformin online[/url]
[url=http://prozac.cfd/]fluoxetine 5 mg[/url]
[url=http://metformin.cfd/]metformin 500mg tablets in india[/url]
[url=https://suhagra.cyou/]suhagra without prescription[/url]
[url=https://prednisolone.directory/]prednisolone 4mg cost in india[/url]
[url=https://albuterol.guru/]albuterol online no prescription[/url]
[url=http://lexapro.cfd/]lexapro tablets price[/url]
[url=https://sildenafil.cfd/]sildenafil 100mg price in india[/url]
[url=http://silagra.cyou/]buy silagra online in india[/url]
[url=https://gabapentin.cfd/]neurontin cap 300mg[/url]
[url=https://tadalafil.cyou/]generic cialis india pharmacy[/url]
[url=https://sildenafil.cfd/]buy brand viagra online[/url]
[url=https://atarax.cyou/]buy atarax tablets[/url]
[url=https://synthroid.cyou/]synthroid 150 mg coupon[/url]
[url=https://budesonide.cyou/]budesonide 180 mcg[/url]
[url=https://synthroid.directory/]price for synthroid 100 mcg[/url]
[url=http://retina.cfd/]tretinoin 0.5 cream[/url]
[url=http://accutane.guru/]accutane prescription australia[/url]
[url=https://citalopram.cyou/]cost of citalopram 40 mg uk[/url]
[url=https://albuterol.guru/]ventolin cream[/url]
[url=http://zithromax.cyou/]buy azithromycin nz[/url]
[url=https://toradol.cfd/]toradol kidney stones[/url]
[url=http://robaxin.cyou/]robaxin 750 mg tabs[/url]
[url=http://azithromycin.digital/]azithromycin prices india[/url]
[url=http://clonidine.cfd/]where can i buy clonidine[/url]
[url=http://lisinopril.best/]zestril 5 mg[/url]
[url=http://hydroxychloroquine.guru/]generic plaquenil coupon[/url]
[url=https://effexor.cyou/]effexor over the counter[/url]
[url=http://avana.cfd/]dapoxetine brand in india[/url]
[url=https://phenergan.cyou/]buy phenergan online uk[/url]
[url=http://finasteride.digital/]propecia 1mg online[/url]
[url=http://doxycycline.directory/]how much is doxycycline cost[/url]
[url=https://trazodone.cfd/]trazodone 20 mg[/url]
[url=http://finasteride.cyou/]buy propecia online usa[/url]
[url=https://effexor.cyou/]effexor 300 mg daily[/url]
[url=http://levitra.cfd/]order levitra 20mg[/url]
[url=https://augmentin.cfd/]amoxicillin from canada[/url]
[url=https://citalopram.cyou/]citalopram 20 mg cost[/url]
[url=http://augmentin.cfd/]amoxicillin 875 tablet prices[/url]
[url=http://synthroid.cyou/]lowest price for synthroid[/url]
[url=http://clonidine.cfd/]where can i purchase clonidine[/url]
[url=http://lisinopril.cfd/]208 lisinopril[/url]
[url=http://finpecia.cyou/]propecia medication[/url]
[url=https://amoxicillin.cyou/]amoxicillin 250 mg capsule price[/url]
[url=https://albuterol.guru/]buy ventolin tablets online[/url]
[url=http://trazodone.cfd/]buy trazodone australia[/url]
[url=https://doxycycline.directory/]doxycycline 3626[/url]
[url=http://doxycycline.cyou/]doxycycline price comparison[/url]
[url=https://augmentin.best/]amoxicillin script[/url]
[url=http://vardenafil.cfd/]order levitra[/url]
[url=http://accutane.guru/]buy accutane australia[/url]
[url=http://lisinopril.cfd/]prinivil 5 mg tablets[/url]
[url=https://vardenafil.cyou/]levitra online canada[/url]
[url=http://lyrica.cfd/]lyrica pills 75 mg[/url]
[url=https://accutane.guru/]accutane prices uk[/url]
[url=https://prednisolone.directory/]prednisolone prednisone[/url]
[url=http://augmentin.cyou/]amoxil capsules 500mg price[/url]
[url=https://lyrica.cfd/]can you buy lyrica online[/url]
[url=https://accutane.cyou/]accutane from canada[/url]
[url=http://zoloft.cfd/]order sertraline[/url]
[url=https://trazodone.cfd/]trazodone hydrochloride 100mg[/url]
[url=https://phenergan.cyou/]order phenergan on line without prescription[/url]
[url=https://colchicine.cyou/]colchicine 6 mg tablet[/url]
[url=https://gabapentin.cfd/]gabapentin pill 600 mg[/url]
[url=https://vardenafil.directory/]how to order levitra online[/url]
[url=http://paxil.cfd/]paxil 200 mg[/url]
[url=https://diflucan.cyou/]diflucan 150mg tab[/url]
[url=http://neurontin.cfd/]gabapentin for sale cheap[/url]
[url=https://finasteride.digital/]propecia 1mg online[/url]
[url=https://paxil.cfd/]paroxetine 12.5 price[/url]
[url=https://wellbutrin.cfd/]wellbutrin 50 pill[/url]
[url=https://vardenafil.directory/]cost of vardenafil[/url]
[url=https://ivermectin.guru/]ivermectin tablets order[/url]
[url=http://propranolol.cfd/]propranolol 5 mg tablet[/url]
[url=http://zoloft.cyou/]purchase generic zoloft[/url]
[url=https://trazodone.cfd/]trazodone 450 mg[/url]
[url=https://metformin.cfd/]medication metformin[/url]
[url=http://sildenafil.cfd/]retail price of viagra[/url]
[url=http://zoloft.cyou/]how to get zoloft without a prescription[/url]
[url=https://hydroxychloroquine.guru/]hydroxychloroquine sulfate nz[/url]
[url=http://accutane.guru/]where can i get accutane uk[/url]
[url=http://vermox.cfd/]vermox over the counter uk[/url]
[url=https://synthroid.boutique/]synthroid 137 mcg cost[/url]
[url=https://ivermectin.cfd/]stromectol price in india[/url]
[url=http://neurontin.cyou/]214 gabapentin[/url]
[url=http://atarax.cyou/]atarax 25 mg tablet[/url]
[url=http://vermox.cyou/]vermox 100mg tablets[/url]
[url=https://phenergan.cyou/]phenergan prices[/url]
[url=https://finasteride.digital/]propecia 1mg price[/url]
[url=http://accutane.cyou/]accutane pills for sale[/url]
[url=https://accutane.cfd/]accutane for sale online[/url]